Saturday, September 16, 2023

No-till Corn? Absolutely!

Golden Bantam Corn @Equimage® Media
Yes, you can grow corn in a new or well-established no-till garden bed.  We decided to try corn late in this growing season (planted July 5) and so far so good.  We decided on the quick maturing heirloom variety called Golden Bantam and purchased  from Baker Creek Heirloom Seed Company, although it is available through many seed brokers.  Fresh seed germinates in 5-7 days, grows to 5-6 feet in height and each stalk generally produces two nice ears in about 75 days. So far we’re right on target.  

This 4x4 bed was hastily created on a whim from some additional scrap lumber between two established 4x4 beds.  Asparagus is on one side and (this year) indeterminate tomatoes on the other.

So far we have 25 nice ears of corn from roughly 50 plants planted in the 4 seeds per square foot configuration in a 4x4 bed. You may think that this is a bit overcrowded but one thing we’ve learned about our no-till method of gardening is that crowded planting is not much of a problem — especially in a brand new bed.
©Equimage® Media, 2023

We have been feeding regularly with Espoma Organic Chicken Manure and Espoma Garden Tone because corn is a real nitrogen hog.  Legume-based no-till lends itself so well to nitrogen-loving plants because that lower layer of alfalfa is loaded with nitrogen.  The corn plant hits that layer and never looks back.

We did water more often than one might think is necessary (a good soaking 2x a week) and placed a six-inch by six-inch net trellis over the bed horizontally and let the corn grow through 
to help keep the corn plants upright during high wind and blowing rain. This tactic, using 4ft T-post in each corner with the net fastened to the posts with zip ties and a couple of 4ft bamboo poles which help connect the posts on each out side, worked beautifully. As the corn grew, the net was raised. We did thread the newly emerged corn plants through the holes in the netting a st the corn grew.

We also lined the bottom of our experimental bed with 1/2 x 1/2 galvanized hardware cloth to thwart the voles and moles. The wire cloth keeps the hordes  from tunneling into the bed to seek out the golden goodness of sprouting corn kernels and new growth plants that they adore.  We take this step with any bed we create because we had  a serious vole and mole infestation in the past. Learn from our mistakes and prepare for subterranean interlopers. Give them enough time and they will find your precious, emerging corn.


We’ll update as we begin picking (and hopefully eating)  — likely early next week.  Now... get out there and get your hands dirty!


All Content ©2011-2023 by The No Till Gardener and Equimage® Ltd. Media All Rights Reserved

Wednesday, August 30, 2023

It’s Cracked!


It’s Cracked — or Cracking

Tete Noir (Dark Head) Cabbage from Baker Creek Seeds.


Summer is moving along. The birds are quieter, the crickets cicadas are noisier, and the Garden is producing in waves.  It’s a busy time; harvesting, cleaning, preserving, eating (we like the last one best).  

One crop that has started giving is the brassicas — aka cabbage cauliflower, and broccoli.  I started my cabbage and broccoli a little late this season so they are coming on a tad late as well. Not the biggest crop I’ve had but definitely the nicest, thanks to sound advice from Susan Mulvihill from Susan’s In the Garden, who advised using fine mesh insect netting to foil the cabbage moths and more evil loopers.  She was right but now I need to preserve the bounty Susan’s advice help create. 

This stunning cabbage called Tete Noir (it’s truly beautiful) was started from Baker Creek Seeds   The cracking is not typical — totally the fault of the gardener for waiting too long to harvest this particular head — as well as an erratic watering schedule - natural and otherwise.  

I always make sauerkraut, something that I will go into in a later post. The process of making Kraut always makes me think of my mother. We stood together at the sink, peeling, and preserving for many years.  I miss her company, although nowadays I’m often accompanied by my daughter and husband.  

I also make my mother’s cabbage rolls to eat and to freeze. I will also get at this one later as well. But for today’s purposes, and because I have an abundance of red cabbage, I’m going to attempt something new — a canned coleslaw.  

My mother and grandmother often made a deliciously tart and sweet frozen slaw with red cabbage, carrots, and green pepper.  The sugary and vinegary slaw freezes beautifully.  Unfortunately, I currently have very little room in the freezer. A quick search of the web and a solution was found — canning the same recipe in a boiling water bath for 10 minutes.  Problem solved.  I do halve the amount of sugar to try to lighten up the recipe a bit but I think our  frozen slaw recipe lends itself perfectly to water-bath canning. It’s a great way to preserve all that red cabbage I planted.

I shred all the cabbage I use with my food processor shredding blade,  changing blades to spread after first grinding the carrot and pepper with the chopping blade. If you’d rather use a knife, by all means, have at it!

Here are photos of my mother’s original recipe card.  The canned slaw recipe calls for a bit more watery brine so I’m not sure what the end result will be.  I offer a link from Cosmopolitan Cornbread  here  if you want to give it a try a long with me. If you do please share in the comments  so we can compare notes. I’d love to hear how it works for you.

We’ll wait six weeks before testing the final result and, while I take the slaw water-bathing plunge,  I highly recommend making and freezing my mother’s frozen  slaw for a more immediate gratification.  It’s delicious bright, flavorful, crunchy (trust me) and a delicious wintertime bite of summer you’ll be glad to pull out of the freezer in January. — if your freezer has room that is.


Frozen Slaw

Mix and let stand for 1/2 to 1 hour:
1 medium head red or white cabbage, shredded
1 grated carrot
1 grated green pepper
1-1/2 tsp salt

Dressing:
Heat until boiling the following:
1 cup white sugar (or 1/2 cup sugar, 1/2 cup monk fruit granular)
1/4-1/2 cup water
1 tsp celery seed
1 tsp whole mustard seed (white or black)
Cool to lukewarm

Squeeze water from cabbage mixture. Replace with dressing.  Toss well. Serve or freeze in quart size freezer bags or containers.

When ready to use, thaw slaw for 1-2 hours and serve.  Mayonnaise may be added for a creamier presentation, if desired.


Now,  get out there and get your hands dirty!
All Content ©2013-2023 by The No Till Gardener and Equimage® Ltd. All Rights Reserved

Monday, August 21, 2023

Why A No-Till Garden?


About the No-Till Gardener...

I've owned this website for a long, long time -- since spring of 2010, in fact.  It began as an offshoot of my other website, Tasting Out Loud. It was while working on that website that  I first discovered the joy of being a No-till Gardener. However, because much can change in 13 years, I’ve decided to update and reissue some useful information about no-till gardening.  Gotta keep things fresh! Therefore, look for some new information and new illustrations mixed in with tried and true information, as well as some new and better.  And, always feel free to comment and reach out with any question you may have, both here and on the No Till Gardener facebook page and YouTube Channel which is also getting a much needed facelift. 


My garden buddy and my garden before...

How can one possibly create a bountiful garden without soil, hoeing, weeding, mulching, and chemicals?   The No-till is just that -- a unique, raised bed technique that defies ordinary gardening culture -- it does so without digging in the dirt,  very little weeding, no chemicals, and moderate watering. And these little botanical gold mines yield enormous amounts of beautiful vegetable from a very small space -- and it just plain old fun! 


Then…

And now


So if you have a hankering for a garden, but not much room, or high motivation for grubbing around the garden but are stuck with hard-packed clay soil, the No Till Garden is for you!


Crazy rain forest of a garden!
Last year, my husband Dave and I decided to buy some cheap lumber, paint it, screw it together, and build ourselves some easy, smeezy, raised beds but we hated the idea of all that digging and double digging. So, we opted for layered gardens made of alfalfa hay, straw, compost, newspapers, bone meal and blood meal.  
You can use topsoil mixed with your compost but it's really not necessary. In fact, over the season, the layers work together, feeding plants while composting themselves into the most beautiful, dark, rich organic soil that you could ever hope to have in your garden.


 Often referred to as Lasagna Gardens, because they are built layer upon layer, these gardens are extremely nitrogen (from the Alfalfa hay) and nutrient rich (from the bone and blood meal and compost which attract worms, feed beneficial bacteria and encourage healthy growth) , so they may be planted quite densely, thereby eliminating most weeding -- a fate that most gardeners despise but are resigned to. But no longer! 
So, one thing builds upon the other and you end up with a little jungle of a garden that just gives and gives -- year round if you plan ahead -- even in the cold and blustery climes!

In the next few days, we will be posting a materials list (much of which may be begged from freecycle, bartered from your friends, or purchased pretty inexpensively) and complete step-by-step photo and maybe even video instructions for building your own 8x4 raised no-till bed in two days or less, after you've gathered together your materials (the extra day is for the paint to dry prior to building your bed, if you decide to paint. If you use cedar wood or the new environmentally friendly pressure treated wood, you can skip the extra day).
You'll see -- when you get through with the building, plant your garden,  and start harvesting your no-till bounty -- you will never view gardening in the same way again!  

So, if your a gardener or gardener wanna-be who is short on space or short on water, longing to be more respectful of the earth and conscious of what you're eating and where it comes from -- or just want to enjoy watching your food grow and teaching your children to be more self-sustaining, No-till gardening is for you!


Step-by-step instructions follow this post. I’ve broken it down into four days.  You can shave off time any way you want, depending on how much free time you have to work on your garden.  


~Nan


Now, get out there and get your hands dirty!

Friday, January 18, 2019

Handy Dandy On-line Tools!

Over the years, I've noticed how much seed companies have raised their game, offering gardeners some very nice free extras and tools to improve the gardening experience.  Along with amazing seed and plant offerings, we now have planting tips and advice, timing, garden design and innovative gardening tools and applications.  Below I offer you a few of my favorite seed and gardening supply company offerings  I'll add to the list when I find them. If you know of any not listed here, leave me a comment and I'll check them out.

Garden Planning Help    If you want to visualize what your garden might look like in the height of the season, or just want help figuring out what to put where, try the Kitchen Garden Planner from Gardeners Supply.  It's a lovely, highly-customizable tool for the raised-bed, square foot,  -- or any gardener for that matter! You can browse through an assortment of lovely pre-planned gardens or plan your own unique garden with this tool. And speaking of tools, if you're looking for some garden related tool, this is the place to start your search. There's also a handy how to use video by Laura from GardenAnswer:  https://www.gardeners.com/how-to/kitchen-garden-planner/kgp_home.html


When, How and What to Plant    If you're like me, you spend quite a bit of time getting your when to plant game plan together.  This little guide from High Mowing Organic Seeds is a big help.  When, how, how deep, spacing, and that all important when is all covered in this nifty little grid:  https://www.highmowingseeds.com/blog/time-to-sow-a-gardeners-guide


High Mowing Seeds Logo


Garden Journaling    Southern Exposure seeds has a very nice, all-in-one that I really enjoy.  Their Garden Journal on-line app allows the gardener to plan, journal, and trouble pests.  It's a day-by-day tracker that helps you keep track of when you should start your transplants indoors, when to fertilize, and more.  The also have a Garden Planner on-line app for advice on what to grow and pests. It requires creating an account but it's worth it.


All Three    If you want to try a different garden planner, along with journaling AND garden tips, look no further than the tools offered by Territorial Seed.  They have nice mobile versions of their tools, something which comes in handy when you're standing in front the seed racks, trying to remember what you have and what you need.  Check it out here: http://gardenplanner.territorialseed.com/


Last, but by no means least,  there's Hudson Valley Seed Company. They are a seed company that incorporates beautiful art in their packaging and offer much of the art for sale along with their wonderful selection of seeds which come packaged in it, if you wish. On these grey winter days its a treat to see the beautiful illustrations that will come winging to your door when your seed order arrives. For those who would like to enjoy some of the illustrations every month, they offer a gorgeous 2019 Calendar featuring lots of lovely gardening illustrations.

And if you want to begin saving seeds, there's great how-to information included in their website! They offer a seed saving kit too.
If you know of any other handy gardenin/seed company tools, please leave me the links in a comment and I'll add to the list.

Now,  get out there and get your hands dirty!
All Content ©2011-2012 by The No Till Gardener and Equimage® Ltd. All Rights Reserved

Thursday, July 25, 2013

Ah, the tomato...

Just a note asking you to follow The No-Till Gardener on Facebook. Stay tuned for a giveaway when we hit the 100 FB likes mark!  We have a ways to go...


Perhaps it should be "Ah, the Tomato!! We love us some tomatoes and tomato products around here. We use about 50 quarts of home canned tomatoes and sauce each year -- hence the double exclamation point rather than the boring elipses in the title.  

Regardless, the tomato harvest is finally coming in. As you can see, there are quite a few varieties involved.  This year I think I planted around 12 plants (it's a little lame that I don't know exactly how many I planted).  This doesn't count the dozen or so that  I started in my Aero Garden.  Roma, Early Girl, Black Crimm (just for fun), and the wonderful Mortgage Lifter (and an as yet to be determined variety or two). I also purchased a grafted heirloom variety (Calabrese I believe it's called) that is in a huge pot out by the pool along side three gorgeous artichoke plants and a brown turkey fig.  This dubious variety list does not include all the volunteer Juliette's and Roma's  (I think that's what they are anyway)that have popped up here and there. At last count, there is only one bed that does not have some type of tomato growing away.  Only the Agrabond-hooped cabbage bed has escaped the nightshade invasion.  

Heirloom Black Crim - notice the black spot on the leaves.

Volunteer tomatoes are a sweet little game of gardening Russian roulette.  They may set up shop in the strangest places but I never have the heart to tear them out because they have such a strong survival ability.  They are little gifts from nature that keep on giving. They are also extremely hardy or they wouldn't appear year after year, of their own volition. I try to save a few seeds from each variety for starting and proper planting the next year. 

In years past, most of the tomatoes used in the 50 quarts of tomatoes and various tomato products were purchased from the grower and then processed at home.  Standing at the sink, steam rising as we peeled and filled jar after jar... then processed and cooled before storage. Now, thanks to my prolific N-TG, I don't even have to purchase a single tomato, not to mention peel before processing.  My little organic garden takes away the worry of wondering just exactly what pesticides the grower may have used.  Now I wash, plop in the jars, add salt and a bit of citric acid, and process.  
Salsa, chili, tomatoes with basil, and yellow tomatoes for lighter sauces, etc.


I am battling some black spot on some of my tomato plants.  The fact that I plant them so closely doesn't help. And we, like the rest of the eastern US, have had an inordinate amount of rain. It's been pretty darn soggy - perfect conditions for some pesky problems to arise.  Thicker mulch would have been a good idea... I think I'll put all the tomatoes in one of the new larger end beds next year. 4x12 should hold quite a few plants with room to spare. That is unless I get carried away again...

For a great, quick pasta sauce recipe, using some of your bountiful harvest of the red globe of goodness visit my other website, tastingoutloud.com!

What's ready to harvest in your garden? What tomato varieties work best for you?


Now... get out there and get your hands dirty!
All Content ©2011-2012 by The No Till Gardener and Equimage® Ltd. All Rights Reserved

Tuesday, March 5, 2013

NOOOOOO more snow!

The garden in winter...

We're expecting another four to six inches of snow! Five days of unrelentingly gloomy, grey skies, followed by one tantalizing partially sunny day. Now, four to six inches of snow!  It's March for pete's sake. Spring is right around the corner -- technically -- a couple of weeks away. And, yet, more snow.  At least we're not in Minnesota...

I've been tinkering with my garden layout this year, using a fun FREE gardening layout tool from http://www.smartgardener.com.  Currently, I have four 4x8 beds.  I'm thinking of closing off the ends with additional 4x12 beds, connecting the northernmost beds together, and adding a small center raised bed on the diagonal (can't be well-represented here)  -- about 3x3.  This would increase my usable gardening area to 289 square feet! Whoo hoo! Here's a screenshot of my plan.  I have the hay, straw, and lumber.  Just need the time -- and A FEW NICE, SUNNY DAYS! 

THIS END IS NORTH
I've been slowly sorting through my considerable seed stash. Like most February Junkies, I've purchased this and that interesting seed from a few purveyors of fine organic seeds.  I also stopped by the garden center the other day to look at  potato sets. I've come across a great idea from Growing Lots Blog about growing potatoes in towers created from old fence wire (I have a rusty roll just itching for repurposing), straw (a no-till gardener's best friend, next to moldy alfalfa hay) and compost (something of which I have in abundance). My plan is to create four of these potato towers and place one on each corner of my garden. That's the plan anyway... 

Time to plant a few things under the hoops... Collards, Kale (two to three types), garlic, lettuce carrots, chard, beets, bok choy, mustard, turnips, and radishes -- lots of radishes. I may add a layer of row cover just beneath the plastic hoop cover. Did you know that each layer of cover you add give you another USDA zone, or so. So adding a layer will give my beds about 20 degrees.  

Do you miss the smell of moist soil, getting your hands dirty in the garden?  If so, check out the Digging In radio program every Wednesday from 4-5 pm on WAIF Radio.  You can listen in on-line, via their live stream...

I'd bet that there is a local gardening radio show near you. If you find one, let me know. I love spreading the word about good gardening media!


Here's to dreaming of getting out there and getting our hands dirty!


Now, get out there and get your hands dirty! 

All Content ©2011-2012 by The No Till Gardener and Equimage Ltd. All Rights Reserved

Friday, June 15, 2012

Peas please -- time for peas!

Finally, it's time to harvest some produce!  This is when my gardening efforts become really exciting.  I can finally see, and feel, the fruits of my no-till labor.

First on the list were peas. My peas were so prolific that they created a screen on my trellis!  I'd put picking them off for a bit too long because I was so busy with professional commitments.  But at last,  the peas are picked and a recipe hunt ensued.

I wanted something that would use these beautiful peas to their full freshness -- something to really accentuate their pea flavor.  I have a recipe of my own in mind and have saved a portion of peas for just such an experiment -- the results of which I will post, with photos, as soon as possible. But being the impatient type, I wanted to eat so I began the hunt through my favorite food blogs and  ran across a recipe called Linguine with Pea Pesto from The Smitten Kitchen. It's a keeper.

I'm taking the liberty of posting it again here, with a few changes in technique. There are some great photos of the finished dish on the the Smitten Kitchen website... I didn't take any because we were in too much of a hurry to eat!

If you have peas to pick in your no till garden or traditional garden, give this recipe a try and --  Enjoy!

Linguine with Pea Pesto

1 1/2 cups (from approximately 1 1/2 pounds peas in pods) fresh pea or a 10­ounce package frozen peas, defrosted 
1 small garlic clove, minced 
2 tablespoons pine nuts, toasted and cooled
1/2 cup (1 1/8 ounces) finely grated parmesan cheese 
1/4 teaspoon table salt, plus more for pasta water 
1/3 cup olive oil 
12 ounces dried linguine
6-8 leaves of fresh basil leaves torn or sliced into chiffonade.

If using fresh peas, prepare a large bowl filled with ice water. Bring a small saucepan of lightly salted water to a boil. Add peas and cook for 2 minutes (this leaves them with a bit of structure). Drain peas then add them to the ice bath (if using) and drain again. If you haven’t used an ice bath, let your peas cool to lukewarm before making the pesto.

If using frozen peas, rinse the peas under hot running water until just thawed. Drain well.

Set aside 1/2 cup of your cooked/thawed peas. Whirl the remaining cup of peas in the work bowl of a food processor with garlic, pine nuts, 1/3 cup parmesan and salt until smooth, about 2 to 3 minutes, scraping down the bowl as necessary. With the machine running, drizzle in olive oil. 

Cook linguine until al dente. Reserve about two cups pasta cooking water (yes, this is a lot, the pea pesto will be surprisingly thick) then drain linguine and return it to pot. Over moderate heat, toss pasta with pesto, reserved peas and as much reserved pasta water as needed to smooth and distribute pesto; let cook for one minute so that the pesto adheres. Adjust salt to taste, add freshly ground black pepper if desired. Serve immediately, garnished with fresh herbs, if using, and remaining parmesan for passing.

Now, get out there and get your hands dirty! All Content ©2011-2012 by The No Till Gardener and Equimage Ltd. All Rights Reserved

Friday, May 4, 2012

Lunch from the Garden: Irene's Egg Salad...

Lunch from the Garden:  Irene's Egg Salad...


One of the joys of having a garden is knowing that right outside is the freshest, most organic produce there is.  And, it's lunchtime.  I have radishes in the garden.  I also have some beautiful early arugula.  I have a few hard-boiled eggs in the fridge.  And, it's time for lunch. I think it's time for some of my mother Irene's Egg Salad!

My mother Irene was a fantastic cook!  Ask anyone who knew her. She was a woman of very strong opinions, unchangeable convictions with a passionate and sometimes volatile temper. But she showed her love through cooking and she was one heck of a cook!

A wonder in the kitchen, my mother could whip up a damn near wonderful meal  (a term my father coined for the delicious meals my mother would whip up from just a few inexpensive ingredients -- or as he said, ... from damn-near nothing) in nothing flat.  Soups, stews, baked goods, potato pasta little dumplings like gnocchi that would melt in your mouth. The mixture of little potato dumplings, crisp bacon, browned onion and golden sauteed cabbage is sublime! This perennial family favorite that we called halushki, was always served in the winter when it was cold outside. (I'll post this recipe after the first frost, when the chill is in the air.)

Another quick fixer upper was her egg salad.  A simple mixture of chopped hard-boiled eggs, thinly sliced celery, good quality mayonnaise, and Laury's Seasoned Salt (had to be Laury's Seasoned Salt to make the flavor just right).  I grew up on this lemony yellow concoction.  Usually it was slathered onto good old white bread before anyone knew the value of whole grain,  or plopped onto a ripe, juicy cored tomato that was sliced almost through and topped with a little more Laury's Seasoned Salt for good measure.

Some people put dill, capers, grated onion, or sweet pickle relish in their egg salad.  Not my mom and generally not me.  I like to be able to taste the egg.  I love the savoriness of the celery as it crunches in my mouth. Nope, my mom's egg salad stands on it's own two (l)eggs.  And, that's the way I like it!

Around here, if you simply must add something, try using the egg salad is as a topping for fresh arugula from the garden, or on sprouted grain bread with a few chopped radishes thrown in.  Any way you eat it, it's delicious.

To some, this recipe may not be blog worthy, but to me, it's just one more piece in the puzzle of my childhood.

Irene's Egg Salad

Serves 1-2 


2 hard-boiled eggs, peeled and diced
one rib of celery, washed and thinly sliced crosswise 
1 Tbs good quality mayonnaise (like Dukes or Hellman's. It's actually quite good with Trader Joe's reduced fat vegan mayo -- go figure)
Laury's seasoned salt - to taste


Mix all ingredients in a bowl, until well blended. Add a sprinkling of seasoning salt, mixing, tasting, and adding a little more until seasoning preference is reached.


Serve on bread, toast, salad greens, or wedged ripe tomatoes. Sprinkle with a little more salt if desired. Enjoy.

Now, get out there and get your hands dirty! All Content ©2011-2012 by The No Till Gardener and Equimage Ltd. All Rights Reserved

Tuesday, May 1, 2012

One Of My Favorite Places -- Marvin's Organic Gardens


I love a good garden store!  The more organically oriented, and bigger, the better!  It's unusual to find everything in one place, but that's exactly what Marvin's Organic Gardens is -- your one-stop shop for all things garden and organic. If you need it for your garden and it's organic, it's a good bet Marvin's  has it.

Marvin's in-house wetlands

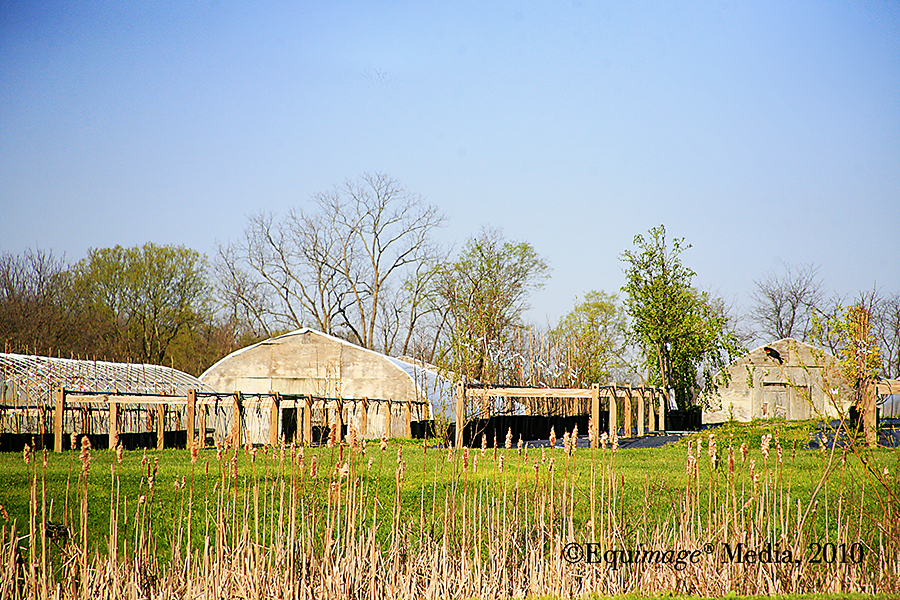
Started in 1999 by Marvin Duren on 67 acres outside Lebanon Ohio, Marvin's Organic Gardens is a full-service organic gardening center.  Mr. Duren became interested in the impact chemicals have on the environment after seeing first hand the devastation wrought by Agent Orange (aka Round-Up) in Vietnam.  He determined that supporting a healthy eco-system was vitally important. Marvin and his son Wes,  continue to operate under that same philosophy by using eco-friendly practices in their landscape services and supplying organic products to commercial and hobby gardeners throughout the region.
Wes Duren 
From heirloom plants to organic compost, garden ornaments to gorgeous cedar raised garden bed frames, Marvins offers the lot.  They even have an on-site wetlands, loaded with frogs and red-winged blackbirds -- natures harbingers of eco-health!


Offering a complete line of organic landscaping services and wholesaling, Marvin's Organic Gardens also has a beautifully laid out, fully organic gardening shop with a great selection of seeds, tools, organic gardening sprays and supplies, plus a nice collection of lovely garden furniture and ornaments for sale.

Marvin's retail store

The greenhouses are enormous -- stocked to the gills with heirloom and hybrid organic plants, water barrels, and a line of organic lawn care products that won't make you feel guilty about having a lawn as lush and green as your neighbors. 

Blackbirds, landscape plants, and lawn care -- the Marvin's Organic way

Compost is something that is dear to the Durens.  Years ago, Marvin began collecting coffee grounds for composting from all of his Waffle House Restaurants.  His son Wes Duren carries on the family tradition of collecting grounds from the restaurants, even after the chain of eateries was sold.  Now, to augment their supply of compost, the Durens create their own buy-the-scoop organic composted horse manure in house by turning literally tons of horse manure -- collected from a nearby racetrack -- into gardening gold. 

Horse manure on it's way to being house-made Eco Gold -- by the scoop
Marvin's Organic Gardens
2055 U.S. Route 42 South
Lebanon, OH 45036
Phone: 513.932.3319
Fax: 513.696.4263

Store Hours: Mon-Sat 9-6, Sunday 12-5


*Disclaimer: I was given absolutely nothing for writing this review.  I wish I had... ;) ~ Nan The No-Till Gardener

Now, get out there and get your hands dirty! 
 All Content ©2011-2012 by The No-Till Gardener and Equimage Ltd. All Rights Reserved

Friday, March 30, 2012

Building a California No-till Garden

Recently, I was in sunny California, visiting my niece.  Had to combine a bit of work with a whole bunch of pleasure -- specifically visiting my niece and her family!  They were the pleasure part.  The work part comes in several forms.  One part horses -- part of my daily professional life as a media/marketing consultant, and one part gardening -- the no-till kind.


Helpers who had trouble with the smell of the composted cow manure were prevalent!